

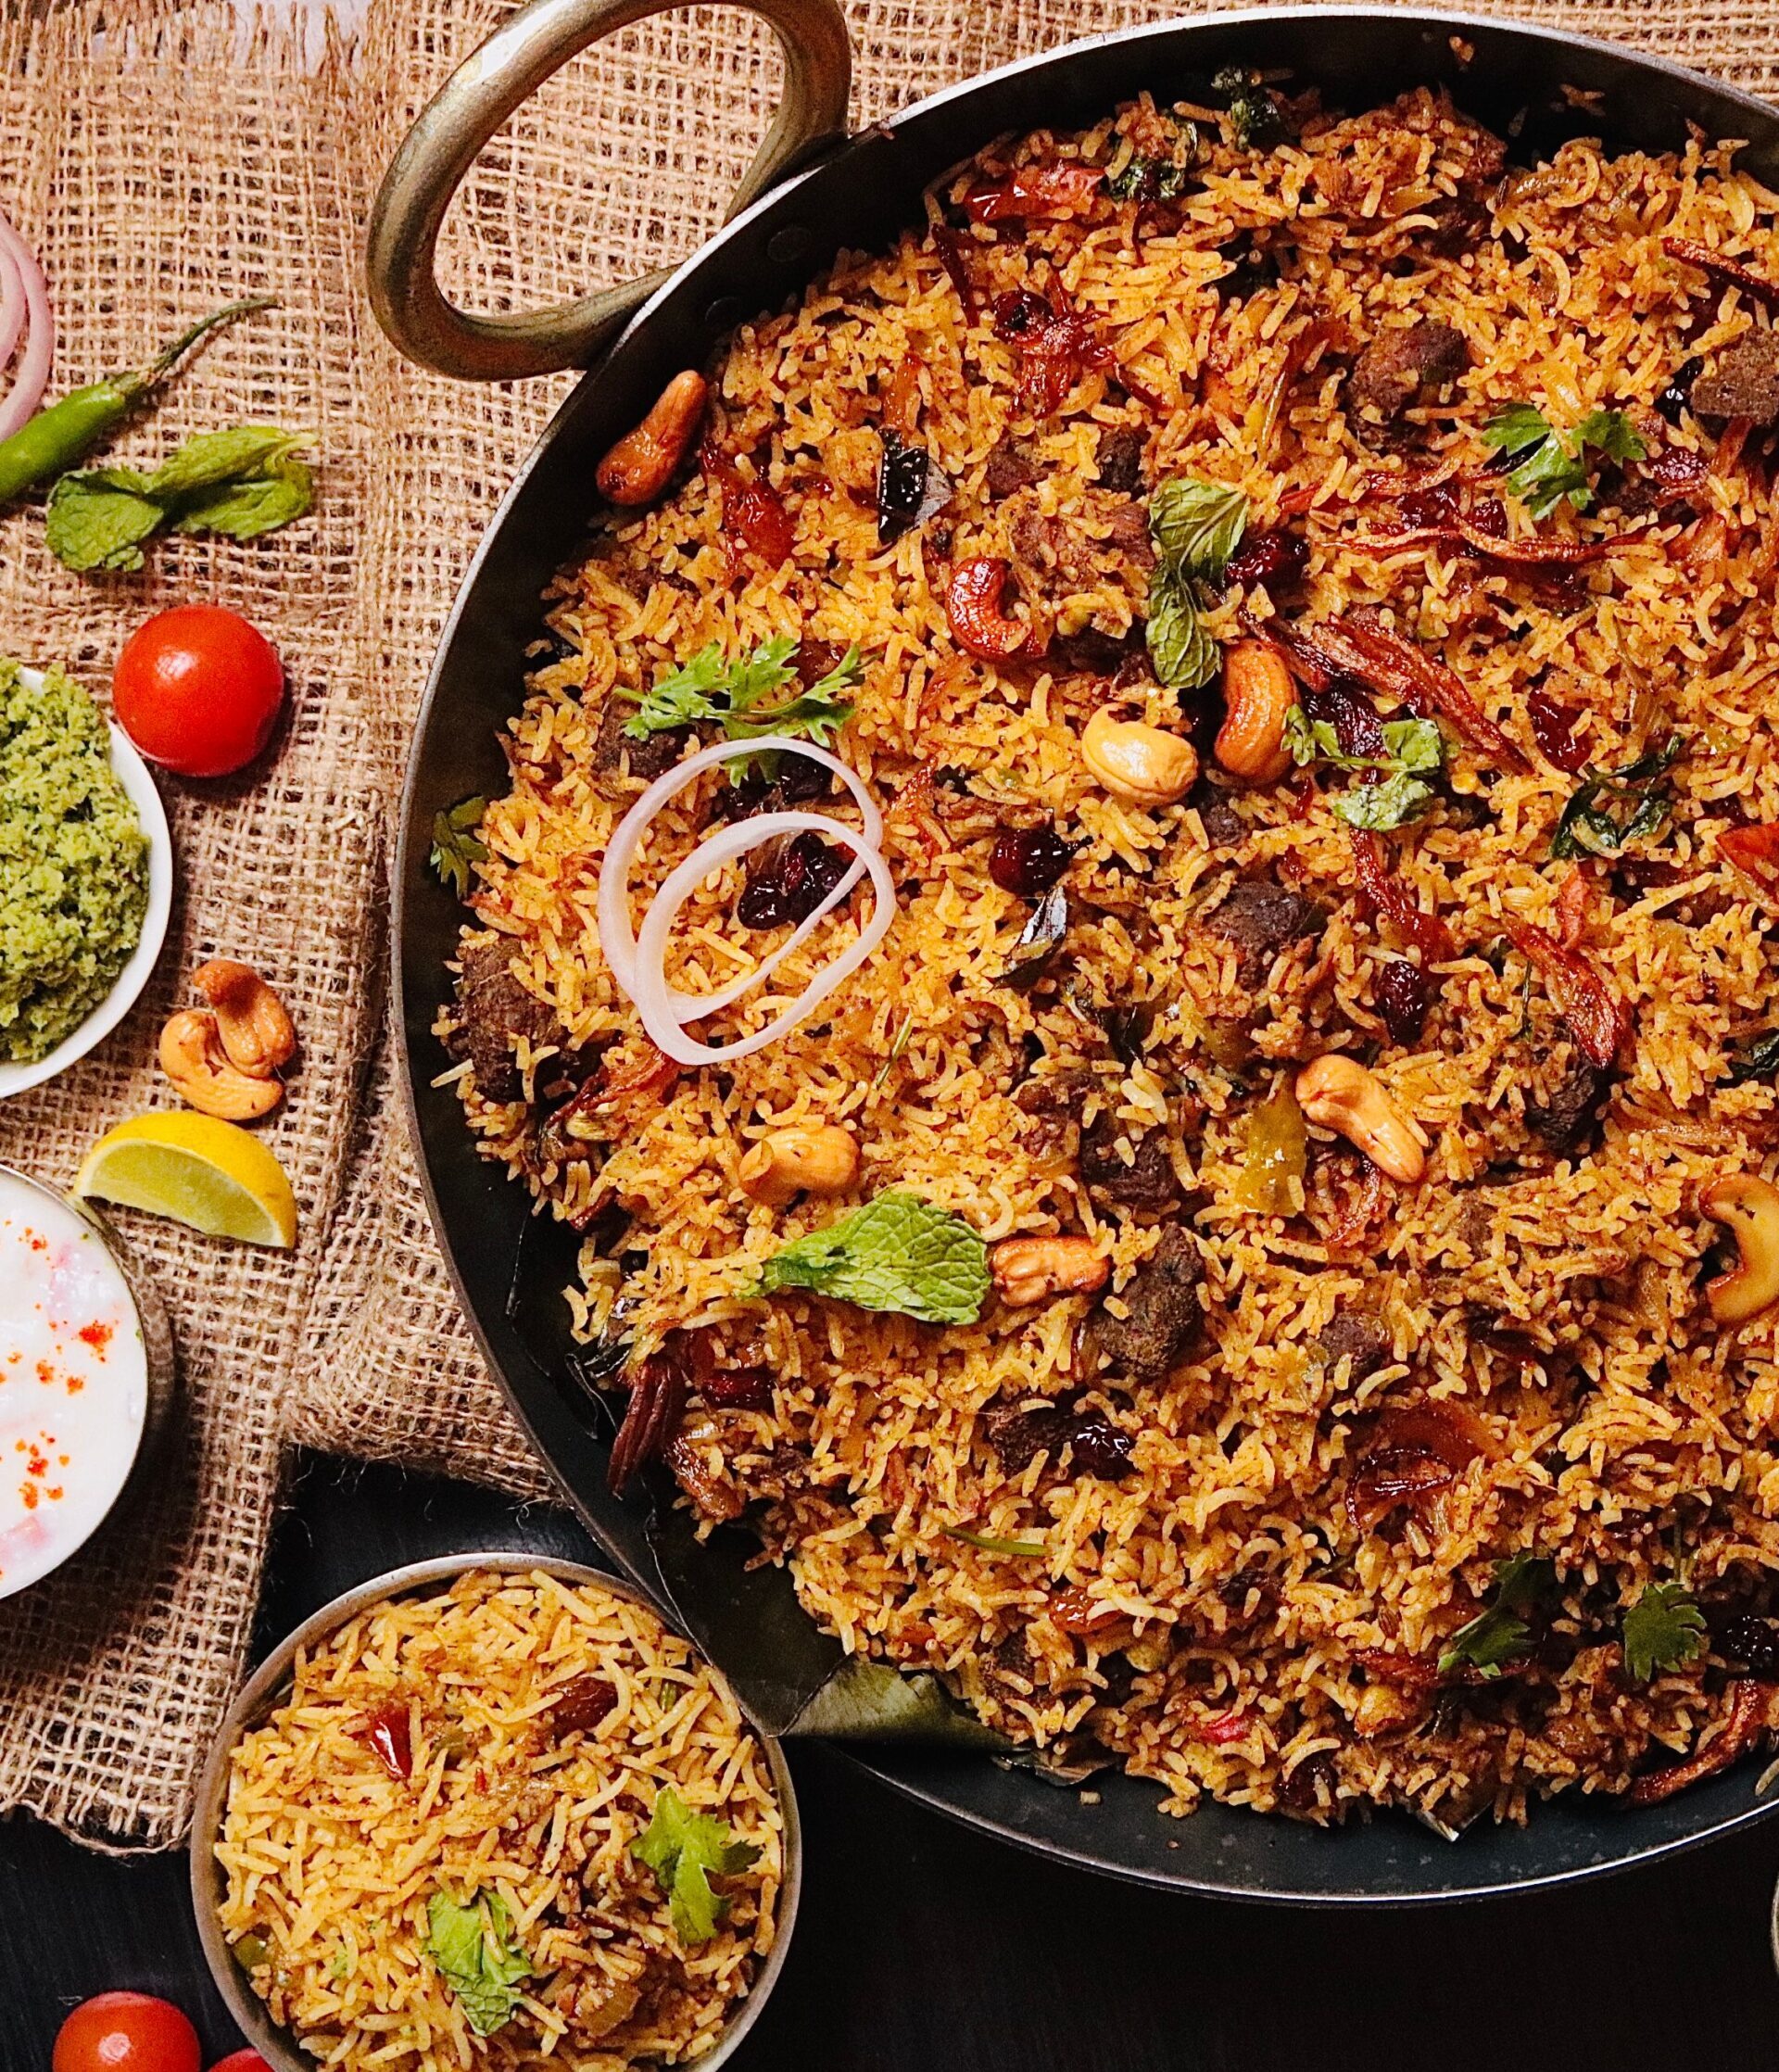
Few dishes command a table quite like a magnificent Indian biryani. Picture this: long, fragrant grains of basmati rice, each one separate and glistening, layered with tender pieces of marinated meat, caramelized onions, fresh herbs, and golden saffron milk — all slow-steamed together in a sealed pot so every aroma mingles into something truly magical. This is not just dinner; this is a celebration in a pot.
This authentic Indian biryani recipe follows the traditional dum method, where par-cooked rice and marinated meat are layered and sealed, then cooked on gentle heat so the steam finishes everything to perfection. The technique comes from the royal kitchens of biryani‘s storied history — a dish refined over centuries across Hyderabad, Lucknow, and beyond, now beloved in homes around the world.
Do not let its royal reputation intimidate you. While Indian biryani has several steps, each one is simple, and I will walk you through every stage with detailed instructions, pro tips, variations, nutritional information, and answers to the most common questions. In about an hour (plus marination), you will serve a biryani worthy of a feast.
Table of Contents
- Why You’ll Love This Indian Biryani
- Ingredients
- How to Make Indian Biryani Step by Step
- Pro Tips for Perfect Biryani
- Delicious Variations
- Nutrition Information
- Frequently Asked Questions
- Serving & Storage
Why You’ll Love This Indian Biryani
Here is why this Indian biryani recipe belongs in your special-occasion repertoire:
- Authentic dum-style flavor: The sealed slow-steam method gives you the true restaurant taste at home.
- Feeds a crowd: One pot generously serves 6–8 people — perfect for gatherings and festivals.
- Make-ahead friendly: Marinate overnight and fry onions ahead; assembly takes just minutes.
- Completely customizable: Works with chicken, mutton, vegetables, eggs, or prawns.
- A complete meal: Protein, carbs, and aromatics all in one glorious pot.
- Showstopper presentation: The moment you lift the lid and the saffron steam rises is pure theater.
Ingredients
Gather these ingredients for the best Indian biryani. Everything is divided into three stages: the marinade, the rice, and the layering.
For the Marinated Meat
- 1 kg chicken or mutton, cut into large pieces — Bone-in pieces give the richest flavor. For mutton, choose tender cuts from the leg or shoulder.
- 1 cup plain whole-milk yogurt — Whisked smooth; it tenderizes the meat and forms the marinade base.
- 2 tablespoons ginger-garlic paste — Freshly made is best.
- 1 tablespoon red chili powder — Kashmiri chili powder for color with moderate heat.
- 1/2 teaspoon turmeric powder
- 1 tablespoon garam masala powder
- 1 tablespoon coriander powder
- Salt to taste — Be generous; the rice is cooked separately and needs the meat well seasoned.
- 2 tablespoons lemon juice
- 3 green chilies, slit
- 1/2 cup chopped mint leaves — Essential for authentic biryani aroma.
For the Rice
- 4 cups aged basmati rice — Long-grain aged basmati is non-negotiable for fluffy, separate grains.
- Water for soaking and boiling
- 4–5 whole cloves
- 3–4 green cardamom pods, lightly crushed
- 1 black cardamom pod
- 2-inch cinnamon stick
- 2 bay leaves
- 1 teaspoon cumin seeds
- 2 tablespoons salt — For the boiling water; the rice absorbs it as it par-cooks.
For Layering & Garnish
- 4 large onions, thinly sliced and fried until deep golden — These crispy onions (birista) are the soul of biryani; fry in batches and drain well.
- A generous pinch of saffron soaked in 1/4 cup warm milk — Gives the signature golden streaks and luxurious aroma.
- 1/2 cup fresh coriander leaves, chopped
- 1/2 cup fresh mint leaves, chopped
- 4 tablespoons ghee, melted — Drizzled over layers for richness and aroma.
- 1/4 cup cashews, lightly roasted (optional)
- 2 tablespoons raisins (optional)
How to Make Indian Biryani: Step-by-Step Instructions
Follow these detailed steps for a foolproof Indian biryani every single time:
Step 1: Marinate the meat. In a large bowl, combine the meat with yogurt, ginger-garlic paste, all ground spices, salt, lemon juice, green chilies, and mint. Mix thoroughly so every piece is coated. Cover and refrigerate for at least 2 hours, ideally overnight. This long marination is the foundation of a deeply flavorful Indian biryani — the yogurt tenderizes while the spices penetrate.
Step 2: Soak the rice. Rinse the basmati rice in several changes of water until the water runs clear, then soak in plenty of fresh water for 30–45 minutes. Soaking ensures the grains cook evenly and grow long and fluffy instead of breaking.
Step 3: Fry the onions. Heat 1/2 cup of oil in a wide pan over medium-high heat. Fry the sliced onions in 2–3 batches, stirring occasionally, until deep golden brown and crisp — about 8–10 minutes per batch. Do not let them turn dark brown or they will taste bitter. Drain on paper towels; they will crisp further as they cool. Reserve 2 tablespoons of this fragrant oil for layering.
Step 4: Cook the marinated meat. In a heavy-bottomed handi or Dutch oven, heat 2 tablespoons of oil and add the marinated meat with all its marinade. Cook over medium-high heat for 12–15 minutes (chicken) or 25–30 minutes (mutton), stirring occasionally, until the meat is about 70% cooked and the raw smell of the marinade is gone. The gravy should be thick, not watery — if needed, cook uncovered for a few minutes to reduce.
Step 5: Par-boil the rice. Bring a large pot of water to a rolling boil. Add the whole spices and salt, then drain the soaked rice and add it to the boiling water. Cook for exactly 4–5 minutes until the grains are about 70% done — still firm and slightly chalky in the center. Immediately drain in a colander. This is the most critical step in any Indian biryani: undercooked rice finishes perfectly on dum, but fully cooked rice turns mushy.
Step 6: Layer the biryani. Spread the cooked meat evenly in the handi. Top with half the par-boiled rice, then scatter half the fried onions, half the coriander and mint, and drizzle with half the saffron milk and 2 tablespoons of melted ghee. Add the remaining rice, then repeat with the rest of the onions, herbs, saffron milk, and ghee. Finish with the reserved onion-frying oil drizzled over the top.
Step 7: Seal for dum. Cover the handi with a tight-fitting lid. For the traditional seal, roll out a simple dough (flour + water) into a rope and press it around the rim where the lid meets the pot, or wrap the lid edge tightly with aluminum foil. This traps the steam — the essence of dum cooking.
Step 8: Dum cook. Place the sealed pot on high heat for 5 minutes to build steam, then reduce to the lowest possible heat and cook for 25 minutes (chicken) or 35 minutes (mutton). Place a flat griddle (tawa) under the pot to diffuse the heat and prevent the bottom layer from scorching — this is the professional secret to a perfect Indian biryani.
Step 9: Rest. Turn off the heat and let the biryani rest, still sealed, for 15 minutes. This resting time lets the steam settle, the grains firm up, and the flavors meld. Do not skip it — cutting into the biryani immediately releases all that precious aroma.
Step 10: Serve. Break the seal and lift the lid away from you to avoid the steam. Gently fluff the top layer with a fork, scooping from the bottom so each serving gets meat, rice, and all the garnishes. Serve hot with raita and accompaniments.
Pro Tips for Perfect Biryani
Master these tips and your Indian biryani will rival the best restaurants:
- Use aged basmati. Aged rice has less moisture, giving longer, fluffier, separate grains.
- Nail the 70% rule. Both the meat and the rice should be about 70% cooked before layering — dum finishes the rest.
- Salt the rice water generously. It should taste like seawater; this is your only chance to season the rice itself.
- Fry onions to deep gold, not brown. Bitter onions will ruin the entire pot.
- Do not skimp on the seal. Escaping steam means uneven cooking and dry rice.
- Use a tawa underneath. A griddle diffuses direct heat and is the single best insurance against a burnt bottom.
- Rest before serving. 15 minutes of resting transforms the texture from steamy-soft to perfectly distinct grains.
- Layer, do not mix. Mixing before dum destroys the beautiful layered presentation and even cooking.
- Warm your serving dish. Biryani cools quickly; a warm platter keeps it steaming at the table.
- Make extra fried onions. They are irresistible for snacking, and running out mid-layering is a tragedy.
Delicious Variations
Once you master the technique, this Indian biryani recipe adapts beautifully:
- Chicken biryani: The classic and quickest version — follow the recipe exactly as written with a 25-minute dum.
- Mutton biryani: Use tender mutton pieces; cook the meat longer in Step 4 and extend dum to 35–40 minutes.
- Vegetable biryani: Replace meat with 4 cups of mixed vegetables (cauliflower, carrots, beans, peas, potatoes) and paneer cubes; reduce Step 4 to 10 minutes.
- Egg biryani: Use 8 hard-boiled eggs, pricked and lightly fried golden, layered in place of meat — economical and delicious.
- Prawn biryani: Add large prawns to the marinade for just 30 minutes (acid overcooks them), and reduce dum time to 15 minutes.
- Pressure cooker biryani: Layer everything in a pressure cooker and cook for exactly 2 whistles on medium heat — a weeknight shortcut that still delivers.
Nutrition Information
Approximate nutrition per serving of this Indian biryani (chicken version, serves 8):
| Nutrient | Amount |
|---|---|
| Calories | 520 kcal |
| Protein | 28 g |
| Carbohydrates | 58 g |
| Fat | 18 g |
| Fiber | 3 g |
| Iron | 25% of daily value |
| Vitamin B6 | 30% of daily value |
Estimates only; values vary with meat choice and portions. This Indian biryani delivers high-quality protein from the meat, energy from basmati rice, and antioxidants from saffron, turmeric, and whole spices.
Frequently Asked Questions
Why is my biryani rice mushy? The most common cause is overcooking the rice in Step 5. It must be only 70% done — firm and slightly chalky in the center — when you drain it. Also ensure the meat gravy is thick, not watery, before layering.
Can I make Indian biryani without saffron? Yes. Substitute 1/2 teaspoon of turmeric mixed into the warm milk for color, though you will miss saffron’s unique aroma. A drop of kewra water or rose water also adds a lovely fragrance.
How do I prevent the bottom from burning? Always place a flat griddle (tawa) under the pot during dum, keep the flame at its lowest, and make sure the meat layer has enough gravy to protect the bottom.
Can I prepare biryani in advance for a party? Absolutely. Marinate the meat overnight and fry the onions a day ahead. On the day, you only need to par-boil rice, layer, and dum — about 45 minutes of active work for a fresh, spectacular Indian biryani.
What is the difference between biryani and pulao? In biryani, par-cooked rice and meat are layered and finished together on dum, creating distinct layers of flavor. In pulao, rice and ingredients are cooked together in one pot from the start, giving a more uniform, milder dish.
How long does leftover biryani keep? Refrigerate in an airtight container for up to 3 days. Reheat gently in a covered pan with a sprinkle of water, or microwave covered. It also freezes well for up to 2 months.
Is Indian biryani very spicy? This recipe is medium-spicy and aromatic rather than fiery. Adjust the chili powder and green chilies to taste — the layered spices provide warmth and fragrance even at lower heat levels.
Serving & Storage
Serve this Indian biryani with cool cucumber-mint raita, a tangy salan or dalcha, sliced onions, lemon wedges, and papad for crunch. A simple green salad adds freshness to the rich, aromatic rice. For drinks, salted lassi or chaas complements the spices perfectly.
Store leftovers in an airtight container in the refrigerator for up to 3 days. To reheat, sprinkle a little water over the rice and warm covered on low heat — the steam revives the grains beautifully. Biryani also freezes well for up to 2 months; thaw overnight before reheating.
More Recipes You’ll Love
If this Indian biryani stole your heart, try these reader favorites:
- Kerala Chicken Curry — fragrant coconut curry that pairs wonderfully with biryani rice.
- Spicy Masala Paneer Salad — a bold, protein-packed starter for your Indian feast.
- Fresh Veggies Brunch — light, colorful brunch ideas for the morning after the feast.
Layered, fragrant, and utterly celebratory, this authentic Indian biryani brings the magic of dum cooking to your home kitchen. Master it once, and you will be the designated biryani maker for every family gathering — a delicious responsibility. Share your biryani triumph in the comments below!
Quick-Reference Biryani Timeline
Here is the entire Indian biryani process at a glance to help you plan:
- Night before (10 min active): Marinate the meat and refrigerate. Soak saffron in warm milk.
- Morning of (15 min active): Fry the onions until deep golden; chop herbs; soak the basmati rice for 30–45 minutes.
- Cooking (45 min active): Cook the marinated meat, par-boil the rice for 4–5 minutes, then layer everything with fried onions, herbs, saffron milk, and ghee.
- Dum (30–40 min hands-off): Seal the pot and steam on low heat — 25 minutes for chicken, 35 for mutton — then rest 15 minutes.
- Serve: Gently fluff, scoop from the bottom, and serve hot with raita. Total: about 60 minutes of active cooking for an unforgettable Indian biryani.
Indian Biryani
Ingredients
Method
- Step 1: Marinate the meat. In a large bowl, combine the meat with yogurt, ginger-garlic paste, all ground spices, salt, lemon juice, green chilies, and mint. Mix thoroughly so every piece is coated. Cover and refrigerate for at least 2 hours, ideally overnight. This long marination is the foundation of a deeply flavorful Indian biryani — the yogurt tenderizes while the spices penetrate.
- Step 2: Soak the rice. Rinse the basmati rice in several changes of water until the water runs clear, then soak in plenty of cold water for 30–45 minutes. Drain well before cooking. Soaking lets the grains absorb moisture evenly so they cook up long, separate, and fluffy instead of breaking.
- Step 3: Fry the onions. Heat 1/2 cup of oil in a wide pan over medium-high heat. Fry the sliced onions in 2–3 batches, stirring often, until deep golden and crisp. Remove with a slotted spoon and drain on paper towels. They will crisp further as they cool. Reserve the onion oil — it is full of flavor.
- Step 4: Cook the marinated meat. In a heavy-bottomed handi or Dutch oven, heat 2 tablespoons of oil and add the marinated meat with all of its marinade. Cook over medium heat, stirring occasionally, until the meat is about 70% cooked and the oil separates at the edges, about 15–20 minutes for chicken and 25–30 minutes for mutton. This step builds the rich base layer.
- Step 5: Par-boil the rice. Bring a large pot of water to a rolling boil. Add the whole spices and salt, then drain the soaked rice and add it to the pot. Boil for 4–5 minutes until it is about 70% cooked — the grains should be firm with a slight bite, not soft. Drain immediately and rinse once with cold water to stop the cooking.
- Step 6: Layer the biryani. Spread the cooked meat evenly in the handi. Top with half the par-boiled rice, then scatter half the fried onions, half the mint and coriander, and a drizzle of saffron milk and ghee. Repeat with the remaining rice, onions, herbs, and saffron milk. Finish with a final drizzle of ghee and a sprinkle of cashews and raisins.
- Step 7: Seal for dum. Cover the handi with a tight-fitting lid. For the traditional seal, roll out a simple dough (flour + water) into a rope and press it around the rim where the lid meets the pot, or simply place a heavy weight on top and drape a kitchen towel over the lid. A tight seal traps the steam — that is what dum cooking is all about.
- Step 8: Dum cook. Place the sealed pot on high heat for 5 minutes to build steam, then reduce to the lowest possible heat and cook for 25 minutes (chicken) or 35 minutes (mutton). Place a flat griddle (tawa) under the pot to diffuse the heat and prevent the bottom layer from scorching — this is the professional secret to a perfect Indian biryani.
- Step 9: Rest. Turn off the heat and let the biryani rest, still sealed, for 15 minutes. This resting time lets the steam settle, the grains firm up, and the flavors meld. Do not skip it — cutting into the biryani immediately releases all that precious aroma.
- Step 10: Serve. Break the seal and lift the lid away from you to avoid the steam. Gently fluff the top layer with a fork, scooping from the bottom so each serving gets meat, rice, and all the garnishes. Serve hot with raita and accompaniments.


5 Comments